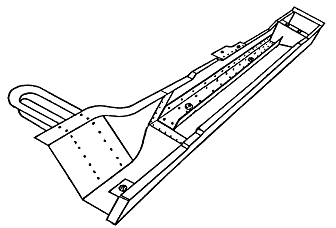
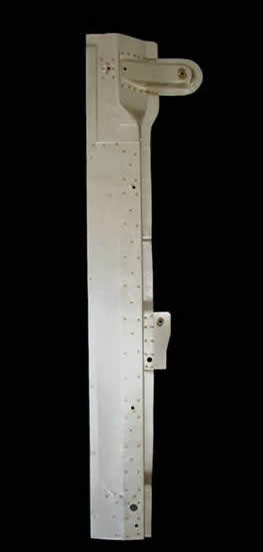
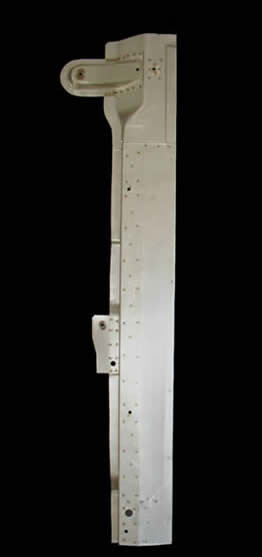
Top quality die formed product intended for the easiest possible installation without the necessity of removing the body from the frame or cutting any of the fiberglass panels.
Overbuilt and specifically reinforced in high stress areas while maintaining original appearance when installed.
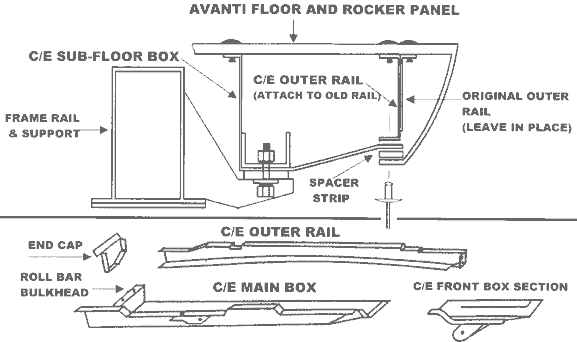
The original Avanti torque box was attached to the body before the body was mounted to the chassis. Thus, the body must be removed in order to properly replace a rusted-out torque box with an original type. Likewise, areas of the fiberglass body may have to be cut out in order to provide access during various stages of installation. You might imagine that both scenarios would be both costly and time consuming, and that such an installation is generally within the capacity of only those with the stoutest of hearts.
We have developed a product that can be installed more easily than an original type of torque box. Our product is made in five main pieces per side. All become a unit when installed. A minimum of welding is required. Our product can be installed without disturbing the finish of a newly-painted Avanti.
We have now developed special tooling that has considerably upgraded our original product. The outer rail is now produced in steel, which is heavier than the original. A special 14-gauge internal stiffener has been added. Other main components are properly die formed.
Special attention has been paid to improved fit, ease of installation, and maintenance of original appearance.
Installation does not require specialized skills or tools. Complete installation instructions are included and are available upon request. Give us a call for further details.
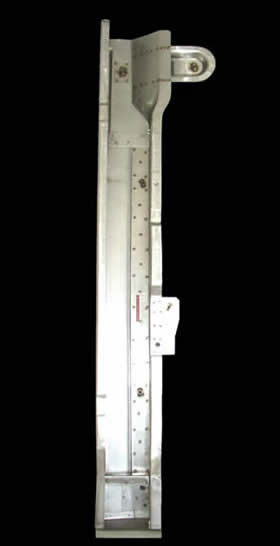
| View From Top: | |
 |
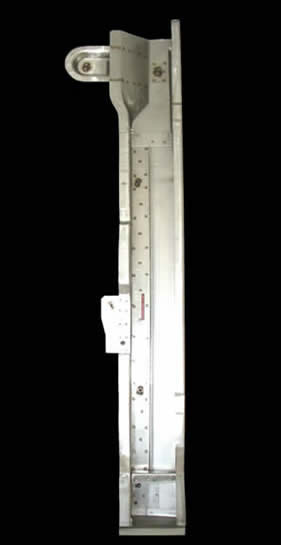 |
| Driver Side | Passenger Side |
| View From Bottom: |
|
 |
 |
| Driver Side | Passenger Side |
OLD SUB-FLOOR BOX REMOVAL
I. Raise and support the car via hoist or jack-stands at appropriate places under the frame.
2. Remove the rear wheels.
3. Check carefully for gasoline leaks and properly prepare to extinguish any fires.
4. Remove the seats and pull carpet back to expose all box edge pop-rivet heads.
5 Drill inboard rivets out.
6. You will be leaving the outboard portion of the original box in place. Get under the car and use a die-grinder cutting wheel or a metal saw to slice the original box along the fiberglass rocker edge. (You will be doing a vertical cut.)(A plasma cut is ok.)
7. Remove body bolts. Save the shim packs making note of placement.
8, Remove enough of the end cap area to expose the roll bar bulkhead. Cut away the box from the bulkhead. Remove what is left of the main box. Use a die grinder to cut roll bar bolt stubs off flush with bolt bar lice. Drill out threaded bolts and release what is left of the bulkhead.
9. Remove all pop rivets from lower lip of rocker panel.
10. Use a die grinder to cut off the lower lip of the original box which fits against the spacer strip leaving only a vertical face of the original box. Remove cutting and clean tip an obstructions.
11. If your original spacer strip can be removed you may do so at this time for re-use later. If it is securely bonded you ma’ leave it in place.
INSTALLING OUTER ROCKER RAIL
I. Clean all as appropriate and test fit C/E rocker rail tight against Avanti floor bottom and original box outer remnants.
2. Note that not all C/E rail holes can be drilled from above. You may have to drill from the bottom up in some cases and rivet from below using rivet washers.
3. Rivet horizontal into remnants at original box outer portion as is appropriate.
4. Do not rivet or apply adhesive to the lower rocker lip area during the processes described above.
ROLL BAR BULKHEAD PREP
1. Pre-installself-tapping bolts up into internal roll bar base plate. (You may have to re-drill holes with 7/16” drill bit.) (Caution-Do not use a drill bit larger than 7/16”.) Remove bolts for re-use later. You max’ have to use an appropriate tap if you can not make our self-tapping bolts do what they are supposed to do. FRONT BOX INSTALLATION 1. Remove the screws which hold our box together.
2. Slide the front box into place. It will pretty well stay in place by itself while you slide the main box into place.
INSTALLATION OF MAIN BOX
I. Remove screws to separate main and front C/B boxes.
2. Install main box by sliding in from side position. slightly ahead of roll bar bulkhead area. Jacking the body upward may be necessary. Jack against roll bar bulkhead base plate area and block between body and frame at traction bar mount or other appropriate places. (NOTE ADDENDUM 10).
3. Careful; pry outer lip of main box up between rocker panel and outer rail lip. Slide box back into position. Note that when working alone, it is helpful to use strips of 18-gauge scrap. long enough to bridge between lip of rocker panel and frame. The box must then be slid back past the spring bolt and then ahead into position again using scrap strips at front of box to ease binding. If absolutely necessary, a small amount may be trimmed of the outside rear edge of our box.
MAIN BOX TO LOWER ROCKER RAIL ATTACHMENT
I. The lower lip of the rocker rail must be directly and securely attached to the edge of the main box, The lower lip of the fiberglass rocker panel and spacer stop, if still in place, will interfere with \‘our efforts.
2. You must use a spot weld cutter or appropriate drill to cut a hole through the lower fiberglass rocker lip and spacer strip large enough to accept a pop-rivet head. Place small rivets between existing rivet holes.
3. Rivet the main box and rocker rail securely together (You will have to use an extended beak riveter).
4. Test fit ‘our original spacer saip if previously removed. You may have to add or subtract width as is necessary between spacer strips and rocker area. You may be able to find appropriate plastic shim strips at a local lumberyard.
5. Apply adhesive as is appropriate and slide your spacer strips into place.
6. Rivet the fiberglass rocker lip through the spacer strip directly into the main box as was done on the original Avanti.
7. Use body putty or a thick adhesive to fill the holes previously cut into the rocker panel lip.
ROLL BAR BULKHEAD INSTALLATION
I. Install and bolt bulkhead securely to the roll bar plate with your self-tapping bolts. Tack weld the bolt head to the bulkhead lip to prevent bolts from coming loose in the future.
2. Clamp and tack weld bulkhead securely to main C/E box section. Make sure that all components are properly and securely attached. END CAP INSTALLATION Position the end cap and rivet and weld to the main box as is appropriate.
FINISHING
I. Caulk any openings as is appropriate.
2. Re-install the shim packs. You may have to add or subtract until satisfactory body alignment happens. Bolt everything down tightly. (NOTE ADDENDUM 12)
3. Paint or undercoat as is appropriate.
4. Re-install your tires or your Avanti will not have proper traction
5. Celebrate with a cruise around town---you are finished
Hints-Odds & Ends-Addendum
1. Our products are either oil or silicone coated. Remove the coating with a solvent and consider the use of an appropriate metal etch before finishing.
2. Do not use aluminum pop rivets. Use either steel or stainless steel rivets,
3. Avanti II types with Moon Roofs have a roof drain tube that follows the door pillar directly down into the sub-floor box. It is advisable to extend the tube. Drill an appropriate hole in the box and let the water flow through rather than into the bottom of the box via the extended tube.
4. Your original box was secured to the fiberglass with adhesive, it is advisable that you do the same. Be sure to clean all metal surfaces properly.
5. During assembly, it is always best to fasten everything down with metal screws and washers first so as to allow flexibility in alignment and also to draw everything together properly. Once draw- down is completed, remove one metal screw and replace with a rivet. Remove the next screw mid replace with a rivet—and so on. Use rivet washers in order to reinforce weak areas. or generally give your job more strength.
6. A die grinder with a cut-off wheel will save you a lot of time in roll bar bulkhead removal. and slicing your old main box away from the original rocker rail.
7. Don’t have a wire feed welder? You can assemble most all of the critical components. and drive your Avanti to a welding shop for the necessary welding. (a muffler shop may take it on)
8. In order to properly raise the body of ‘63 & 64’ Studebaker Avanti types it will be necessary to remove the four bolts which hold the rear bumper to the frame, and likewise remove the trunk floor corner support bolts, it is advisable to remove the two bolts which hold the steering column to the dash. Avanti II types have more clearance between the body and frame compared to Studebaker types and may not require raising the botdy at all.
11. Select an appropriate time to straighten or de-warp the body to achieve your best door fit and for the closure of stress cracks. Support the body in that position until the sub-floor boxes are filly installed and all adhesives are properly set. (Note that improper door fit was built into some models and may not be possible to change).
12. The amount of shims used between the original sub-floor boxes and frame support horns varied during the assembly of all Avanti types. Studebaker types may have used one or two per bolt where Avanti II may have used a stack of two inches or more. Use your own judgement before bolting everything down.
13. Having trouble with a rusty nut or bolt’? Apply heat and quench with a common candle.
14. Be sure that all seat belts are anchored securely.
15. A tube of adhesive and all bolts and rivets are now included with your order. Hints-Odds & Ends-Addendum


